.jpg)
We all know Google Ads is still the number one way to advertise digitally - with a projected $103 billion being spent globally on the platform in 2019, we can safely say it’s a fairly important part of any digital marketer’s toolbox 😉 .
So, with all that money being spent, and all those users being targeted, shouldn’t we try to get the most out of our ad spend? Usually, we would immediately suggest using PixelMe shortened link to enabled retargeting for your ad clicks - i.e. adding your Facebook, Twitter, or other ad platform pixel to your ad, so you can later serve them related ads on other platforms. However, Google made this slightly more difficult when they decided to only allow actual destination URLs in their ads 🙈 . So we couldn't retarget users with Google Ads using PixelMe links - or so we thought. 😏
Luckily, there’s a bit of a workaround we can use to make sure you can use all those precious Google Ads clicks and create custom audiences with engaged users on any other platform you’d like!
In this blog post, we’ll show you how to use a retargeting enabled shortened link in your Google Ad, and use the information gathered from that link to create a custom Facebook audience. While this tutorial is for Facebook specifically, the idea is similar for most platforms you want to retarget on.
Step 1: Add your Facebook pixel to your PixelMe account
For this, you’ll need a PixelMe account. Don’t have one yet? Don’t worry - it’s free to sign up, and you get 7 days to try out all our features 😃 .
To make sure we can retarget users on Facebook, we'll need to add a Facebook pixel to our account.
(Make sure you have a Facebook pixel. Follow these instructions if you don't, then come back to continue here 😉.)
Sign in to Facebook Ads and if you're not automatically redirected to the Events manager, navigate to there. Copy the Pixel ID of the pixel you'd like to use.

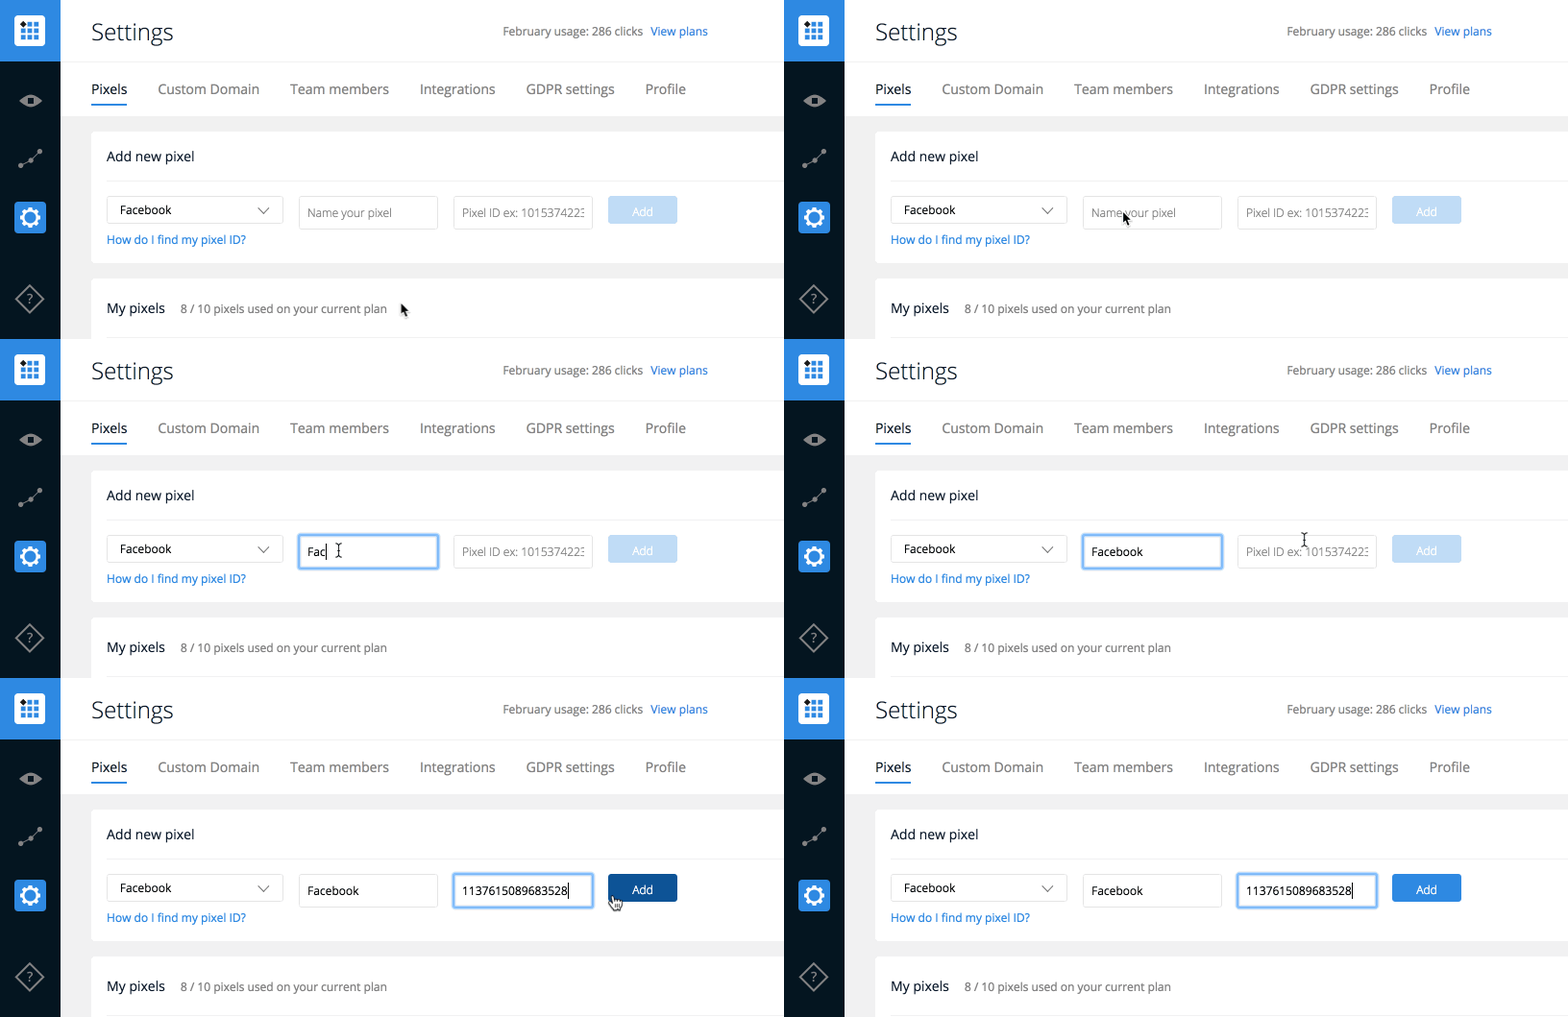
Click on the Audience Builder tab with the link icon 🔗 in the left-hand menu, then select "Settings" at the top to get to the Pixels tab. Take your Facebook ID and paste it to PixelMe under "Add New Pixel"! Make sure you give it a name that will help you identify it later.

Step 2: Create your ad link
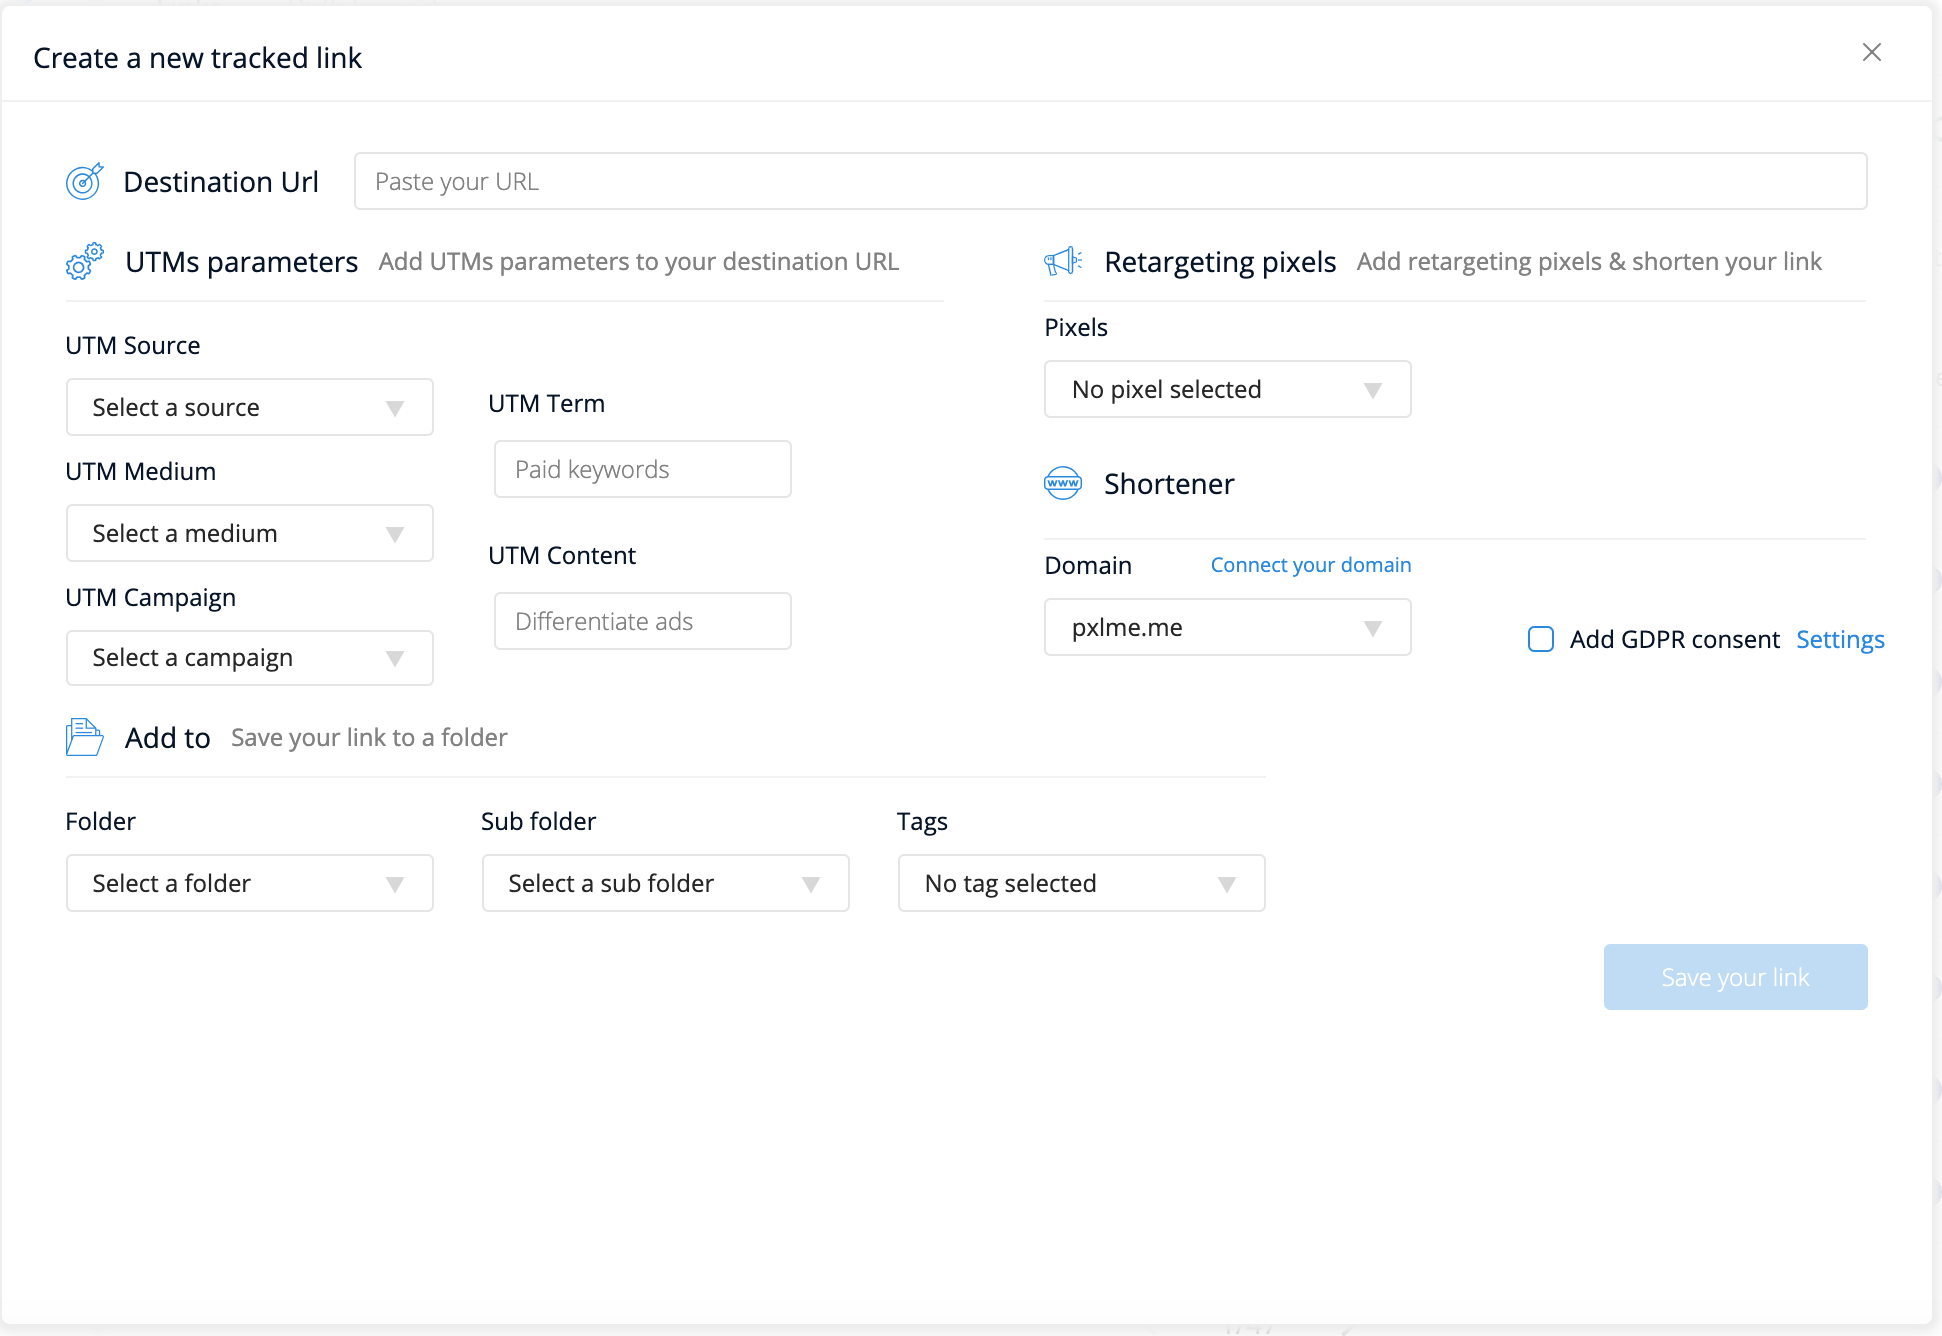
In the dashboard, press the ‘Create a link’ button to set up your link. In the destination URL field, fill in the link of the page you’d like your users to eventually end up at.

Set your UTMs accordingly, and select your Facebook retargeting pixel from the dropdown menu. Save your link and copy the shortened URL it gives you.
Step 3: Create your Google Ad
Head over to your Google Ads account, and set up an ad in whichever way best suits you.
Navigate to your Campaigns → Ad groups, and either create a new ad or edit a campaign you're already running.
The most important part here is that when you're writing your ad copy, you expand the 'Ad URL options' at the bottom of the page and paste your shortened link in the tracking template.
In the "Final URL", put the URL as it was before you shortened it.

Step 4: Retarget users!
We're almost done! Now, just launch your ad and let it gain some traction before moving on to the next part - retargeting those users with more ads on Facebook 💪.
Go back to your Facebook business events manager, select your pixel, and create a custom audience.

In the audience creation module, set the URL option to 'People who visited specific web pages' 'equals' and add the shortened URL you used in your Google Ad. Save your audience.

Now, when you go to create your Facebook ad, just select your new audience in the audience options and you're ready to roll.
Voila! You've got yourself a bunch of people to target who are definitely interested in what you're selling, since they've seen an ad from you before! 🎉That's really all there is to it! If you'd like to give it a try, free of charge, just sign up for our 7 day free trial.
.svg)
%20(1).webp)